Introduction
I am so excited to be in Week 3 of the #4articles4week challenge. This week, I am going to finish Projects of Legacy Responsive Web Design by Freecodecamp which I have been procrastinating for months. These projects helped me to revise the basics of HTML and CSS as discussed in the course.
My Latest Project
Project 1: Building a Tribute Page
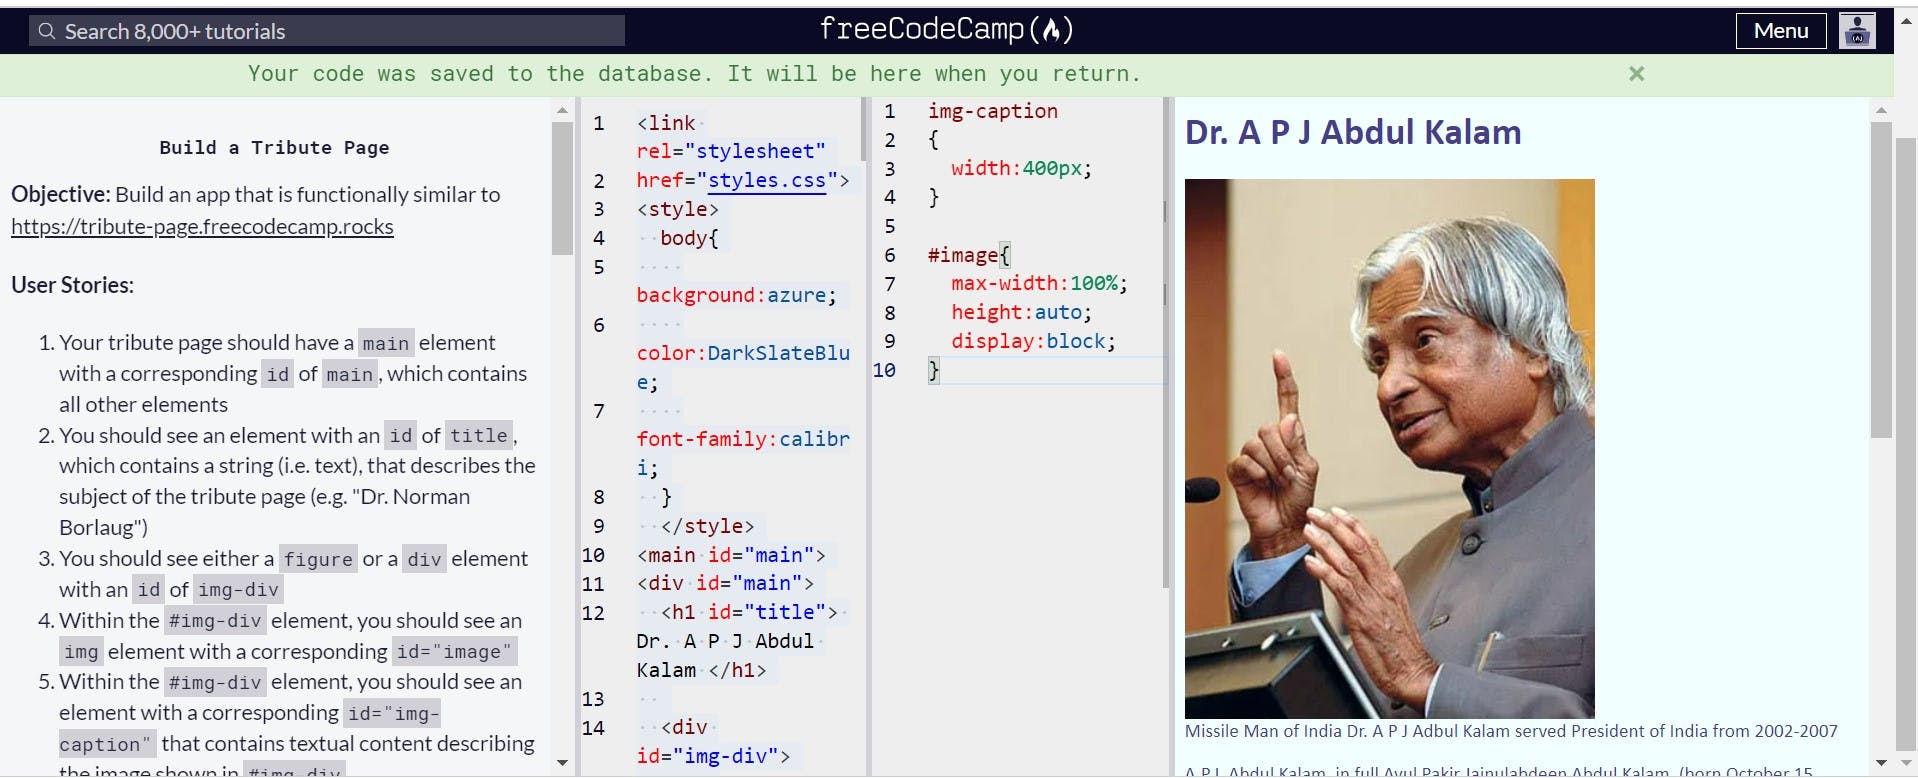
I created a tribute page for Dr. A P J Abdul Kalam who has been an inspirational figure for me. Sharing the HTML and CSS Code of my project as below
HTML
<link rel="stylesheet"
href="styles.css">
<style>
  body{
    background:azure;
    color:DarkSlateBlue;
    font-family:calibri;
  }
  </style>
<main id="main">
<div id="main">
  <h1 id="title"> Dr. A P J Abdul Kalam </h1>

  <div id="img-div">
    <a id="tribute-link" target="_blank" href="https://www.britannica.com/biography/A-P-J-Abdul-Kalam" >
    <img id="image" src="https://cdn.britannica.com/56/148856-004-2F59E2D9/APJ-2008.jpg" alt="Picture of Dr. A P J Abdul Kalam" height="50%">
    </a>
    <figcaption id="img-caption"> Missile Man of India Dr. A P J Adbul Kalam served President of India from 2002-2007 </figcaption>
  </div>

  <p id="tribute-info">

    A.P.J. Abdul Kalam, in full Avul Pakir Jainulabdeen Abdul Kalam, (born October 15, 1931, Rameswaram, India—died July 27, 2015, Shillong), Indian scientist and politician who played a leading role in the development of India’s missile and nuclear weapons programs. He was president of India from 2002 to 2007.

Kalam earned a degree in aeronautical engineering from the Madras Institute of Technology and in 1958 joined the Defence Research and Development Organisation (DRDO). In 1969 he moved to the Indian Space Research Organisation, where he was project director of the SLV-III, the first satellite launch vehicle that was both designed and produced in India. Rejoining DRDO in 1982, Kalam planned the program that produced a number of successful missiles, which helped earn him the nickname “Missile Man.” Among those successes was Agni, India’s first intermediate-range ballistic missile, which incorporated aspects of the SLV-III and was launched in 1989.

Chandigarh. Statuettes at the Rock Garden of Chandigarh a sculpture park in Chandigarh, India, also known as Nek Chand's Rock Garden. Created by Nek Chand Saini an Indian self taught artist. visionary artist, folk artist, environmental art

In 2002 India’s ruling National Democratic Alliance (NDA) put forward Kalam to succeed outgoing President Kocheril Raman Narayanan. Kalam was nominated by the Hindu nationalist (Hindutva) NDA even though he was Muslim, and his stature and popular appeal were such that even the main opposition party, the Indian National Congress, also proposed his candidacy. Kalam easily won the election and was sworn in as India’s 11th president, a largely ceremonial post, in July 2002. He left office at the end of his term in 2007 and was succeeded by Pratibha Patil, the country’s first woman president.

Upon returning to civilian life, Kalam remained committed to using science and technology to transform India into a developed country and served as a lecturer at several universities. On July 27, 2015, he collapsed while delivering a lecture at the Indian Institute of Management Shillong and was pronounced dead from cardiac arrest soon afterward.

Kalam wrote several books, including an autobiography, Wings of Fire (1999). Among his numerous awards were two of the country’s highest honours, the Padma Vibhushan (1990) and the Bharat Ratna (1997).
  </p>

</div>
</main>
CSS
I selected color from here.
img-caption
{
  width:400px;
}

#image{
  max-width:100%;
  height:auto;
  display:block;
}
This is how it turned out to be -
Project 2 - Building a survey form
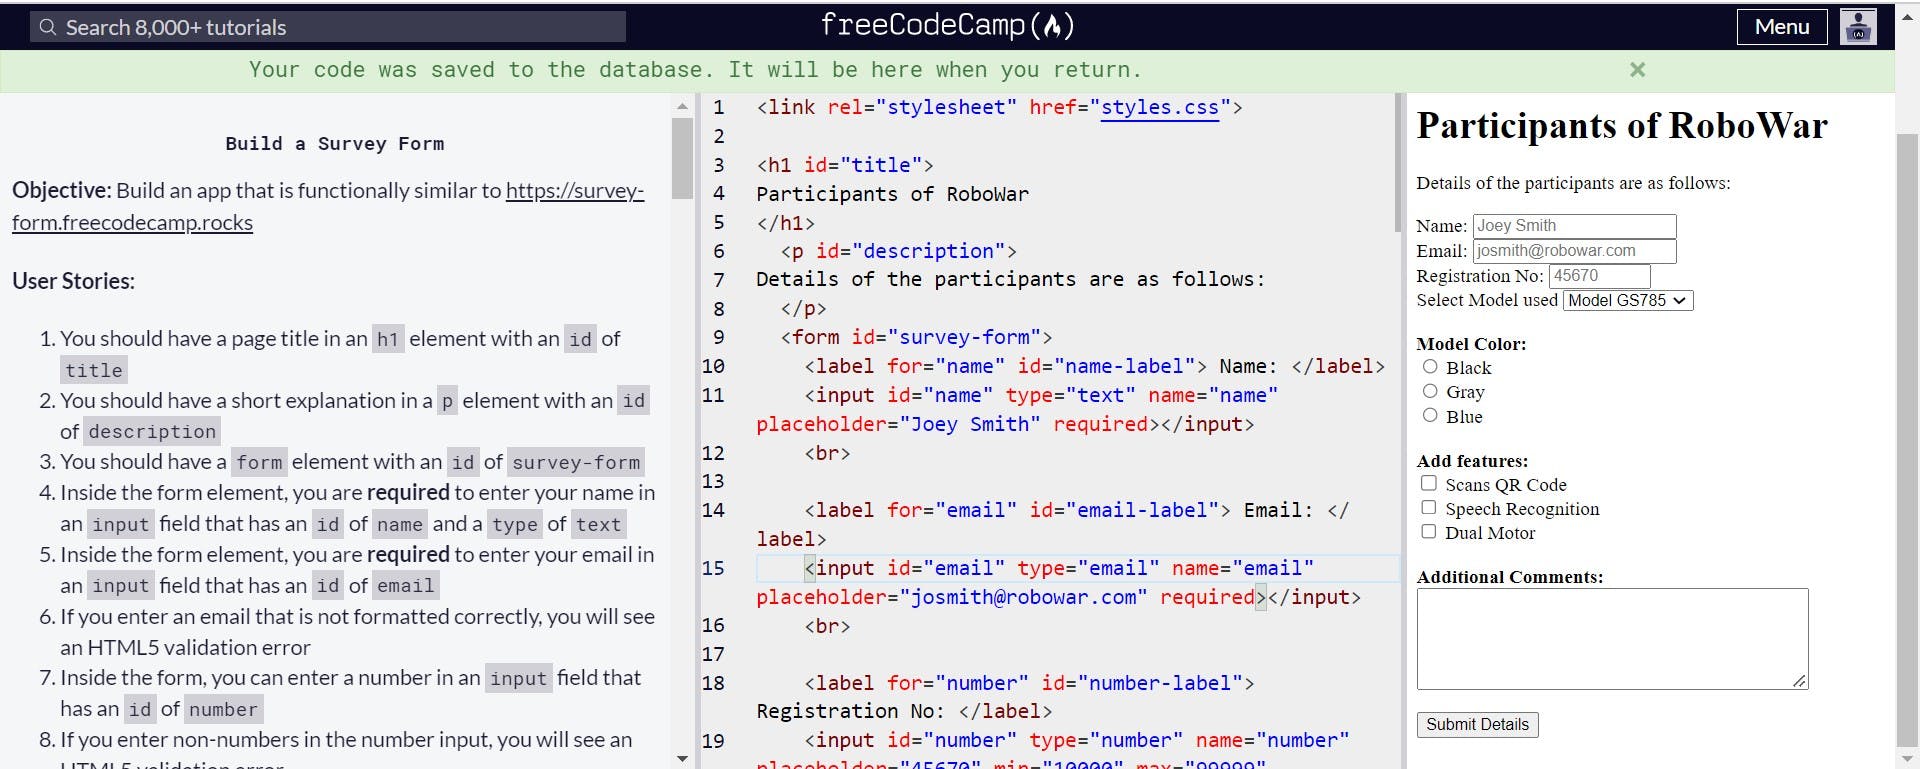
I created a survey form for participants of an event called RoboWar in an inter-college competition. Sharing the HTML and CSS code of the project below:
HTML
<link rel="stylesheet" href="styles.css">

<!DOCTYPE html>
<html>
<h1 id="title">
Participants of RoboWar
</h1>
  <p id="description">
Details of the participants are as follows:
  </p>
  <form id="survey-form">
    <label for="name" id="name-label"> Name: </label>
    <input id="name" type="text" name="name" placeholder="Joey Smith" required></input>
    <br>

    <label for="email" id="email-label"> Email: </label>
    <input id="email" type="email" name="email" placeholder="josmith@robowar.com" required></input>
    <br>

    <label for="number" id="number-label"> Registration No: </label>
    <input id="number" type="number" name="number" placeholder="45670" min="10000" max="99999" required></input>
    <br>

<label for="dropdown" id="model"> Select Model used </label>

<select id="dropdown"
   <option value="Model_X347"> Model X347 </option>
   <option value="Model_GS785"> Model GS785 </option>
   <option value="Model_M398"> Model M398 </option>
   <option value="Model_AS567"> Model AS567 </option>
   <option value="Model_TR298"> Model TR298 </option>

   </select>
   <br>
    <br>
    <label for="model_color" id="model_color"> <b>Model Color:</b></label>
    <br>

    <input id="model_color" type="radio" id="black" name="color" value="black">
    <label for="model_color"> Black </label>
    <br>

 <input id="model_color" type="radio" id="gray" name="color" value="gray">
    <label for="model_color"> Gray </label>
    <br>

    <input id="model_color" type="radio" id="blue" name="color" value="blue">
    <label for="model_color"> Blue </label>
    <br>
    <br>

    <label for="features"> <b>Add features:</b> </label>
    <br>
<input id="checkbox" type="checkbox" name="features" value="scans_QR_code">
<label for="checkbox">Scans QR Code </label>
<br>

<input id="checkbox" type="checkbox" name="features" value="speech_recognition">
<label for="checkbox">Speech Recognition </label>
<br>

<input id="checkbox" type="checkbox" name="features" value="dual_motor">
<label for="checkbox">Dual Motor </label>
<br>
<br>

<label id="textarea" > <b>Additional Comments:</b>
</label>
<br>
<textarea id="textarea" name="instructions" rows="5"
cols="40">

</textarea>
<br>
<br>
<input id="submit" type="submit" value="Submit Details"

    </form>
</html>
This is how it turned out to be
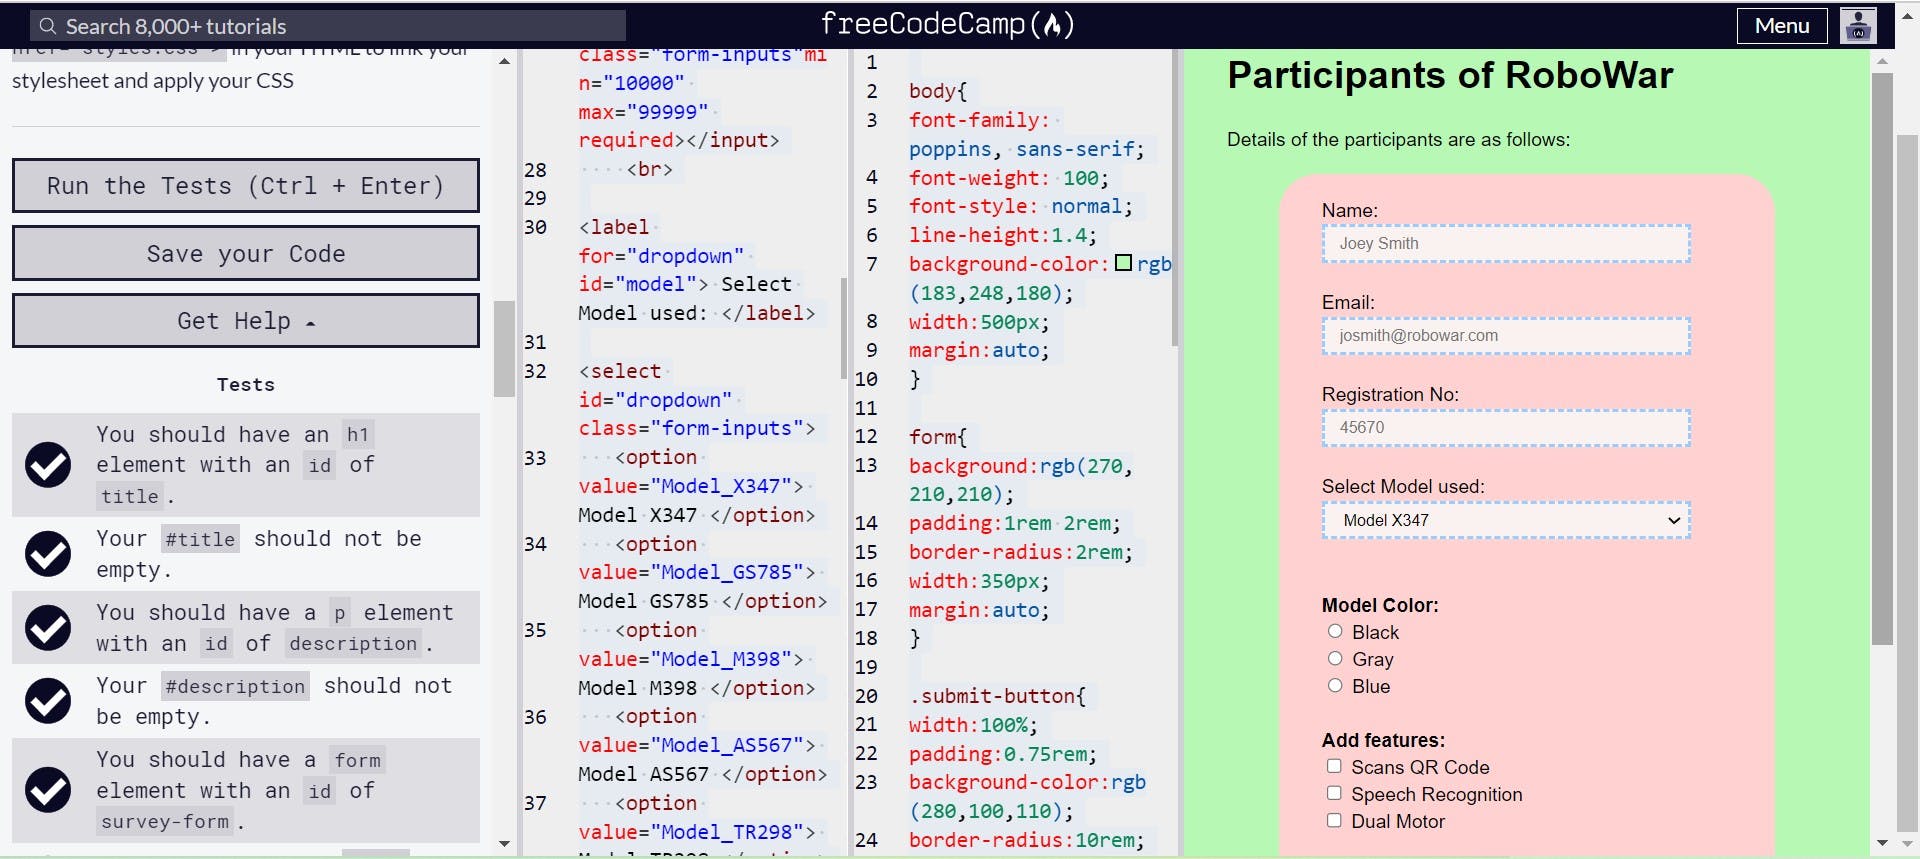
Styling more with CSS
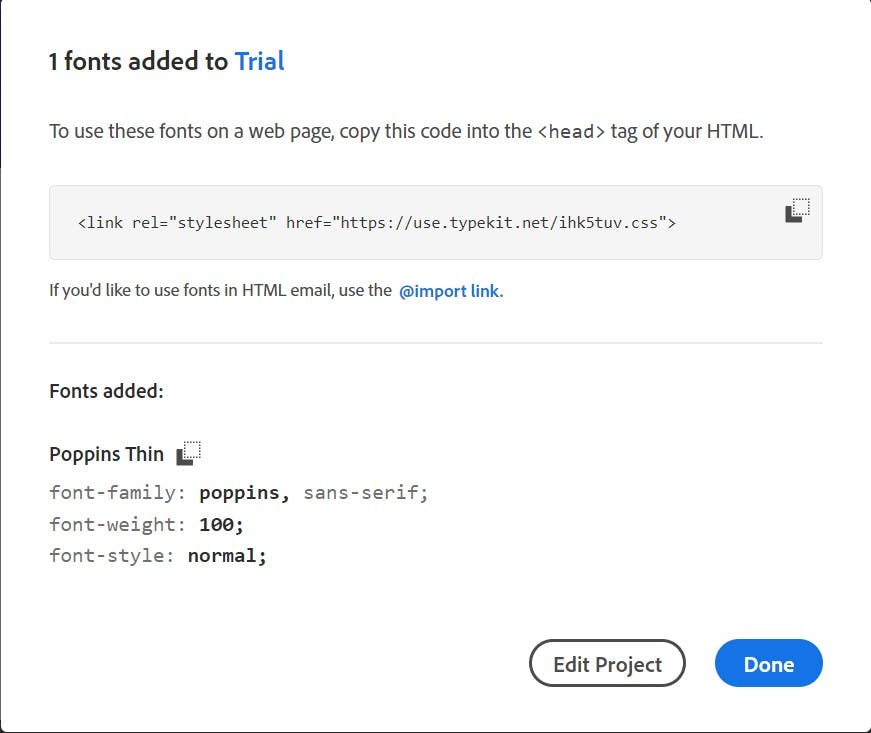
I used color from RGB picker from here. I used the concept of creating Class references in HTML and using that reference in CSS for styling.
HTML
<link rel="stylesheet" href="styles.css">
<!DOCTYPE html>
<html>
  <header>
    <h1 id="title"> Participants of RoboWar </h1>
  </header>
  <body>
    <p id="description"> Details of the participants are as follows: </p>
    <form id="survey-form">
      <div class="input-headings">
        <label for="name" id="name-label"> Name: </label>
        <input id="name" type="text" name="name" placeholder="Joey Smith" class="form-inputs" required></input>
        <br>
        <label for="email" id="email-label"> Email: </label>
        <input id="email" type="email" name="email" placeholder="josmith@robowar.com" class="form-inputs" required></input>
        <br>
        <label for="number" id="number-label"> Registration No: </label>
        <input id="number" type="number" name="number" placeholder="45670" class="form-inputs" min="10000" max="99999" required></input>
        <br>
        <label for="dropdown" id="model"> Select Model used: </label>
        <select id="dropdown" class="form-inputs">
          <option value="Model_X347"> Model X347 </option>
          <option value="Model_GS785"> Model GS785 </option>
          <option value="Model_M398"> Model M398 </option>
          <option value="Model_AS567"> Model AS567 </option>
          <option value="Model_TR298"> Model TR298 </option>
        </select>
        <br>
        <br>
        <label for="model_color" id="model_color">
          <b>Model Color:</b>
        </label>
        <br>
        <input id="model_color" type="radio" id="black" name="color" value="black">
        <label for="model_color"> Black </label>
        <br>
        <input id="model_color" type="radio" id="gray" name="color" value="gray">
        <label for="model_color"> Gray </label>
        <br>
        <input id="model_color" type="radio" id="blue" name="color" value="blue">
        <label for="model_color"> Blue </label>
        <br>
        <br>
        <label for="features">
          <b>Add features:</b>
        </label>
        <br>
        <input id="checkbox" type="checkbox" name="features" value="scans_QR_code">
        <label for="checkbox">Scans QR Code </label>
        <br>
        <input id="checkbox" type="checkbox" name="features" value="speech_recognition">
        <label for="checkbox">Speech Recognition </label>
        <br>
        <input id="checkbox" type="checkbox" name="features" value="dual_motor">
        <label for="checkbox">Dual Motor </label>
        <br>
        <br>
        <label id="textarea">
          <b>Additional Comments:</b>
        </label>
        <br>
        <textarea id="textarea" name="instructions" rows="5" cols="40"></textarea>
        <br>
        <br>
        <input id="submit" type="submit" value="Submit Details" class="submit-button">
      </div>
    </form>
  </body>
</html>
CSS
body{
font-family: poppins, sans-serif;
font-weight: 100;
font-style: normal;
line-height:1.4;
background-color:rgb(183,248,180);
width:500px;
margin:auto;
}

form{
background:rgb(270,210,210);
padding:1rem 2rem;
border-radius:2rem;
width:350px;
margin:auto;
}

.submit-button{
width:100%;
padding:0.75rem;
background-color:rgb(280,100,110);
border-radius:10rem;
cursor:pointer;
}
.input-headings
{
margin:0 auto 1.25rem auto;
padding:0.25rem;
}

.form-inputs{
display:block;
width:90%;
height:2rem;
padding:0.2rem 0.75rem;
background-color:rgb(250,242,240);
border:3px dashed #9cff;

}
My Takeaways from these projects
There's no denying fact that without working on projects, concepts of any language will not appear handy in the long run. I really enjoyed learning from this course as it's a very well structured course which can help a beginner like me to learn basics well. I wasn't so confident about applying what I had learned because real-life problem will not appear with hints. After trying my hands at these projects, I could recall what I had learned and revisit what I had studied before. I felt more confident to apply the concepts that I had learned through this course.
I would definitely recommend this course to anyone who wants to learn more about responsive web design.
